
Product categories
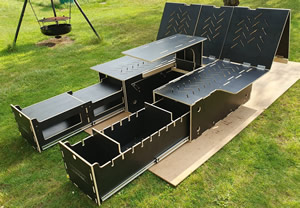
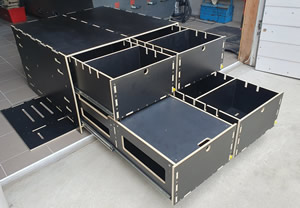
How and why
Practicality and flexibility are the two main words that describe what we do here at Xpert Makes. If a piece of furniture such as a camping box or a storage system has several compartments, manufacturing that piece of furniture from various modules is an achievable task.
At the end of the day both, camping boxes as well as drawer systems, are made of several parts. Instead of thinking "parts for a complete piece" we're thinking "parts for a module that in turn will make up the complete piece"
Making some parts foldable offers flexibility and requires a smaller storage area. And when it comes to vehicle furniture, every millimeter matters. While the sleeping surface of a camping box needs to be at least as long as the person sleeping on it, it is a great advantage if that same surface can become smaller when not in use.
Why not fold it on top of the storage boxes?
Well, that is exactly what we do. The sleeping sections of our camping boxes are foldable. This way our camping kits can fit in the trunk of a vehicle in such way that, when not in "sleeping mode" all seats in the vehicle can be used.
Alright, alright! But what about stiffness? Yes. This was one of the challenges we solved.
Plywood is a great material especially due to its balanced strength and stability across different directions. But when it comes to joining, it can be tricky. We found a solution to this :-) You can read about it down in the challenges section.
Modularity doesn't only mean something can be built from various modules. It also offers the possibility to start from a base model and add features to it over time.
For example, let's say you wish for a fully featured camping box made of 3 modules. One with a kitchen drawer, another module with a storage drawer and a third module in the middle, having a raisable table. But you don't have the budget for all this.
Well, you can start with a base model made up of 3 modules without the drawers or only with one of the drawers. Or, to reduce the initial cost even more, you could start with two barebone modules and ad features such as drawers and raisable table to it later. Such strategy can reduce the costs significantly. And our modules are fully functional even as barebones (open storage space instead of drawer)
However, they do come pre-drilled and with the t-nuts pressed in, ready for a drawer to be installed at a later time. Installing a drawer usually means to screw 8 screws into those already pressed in t-nuts.
This is one way to split the cost over time while still being able to use the product from day one.
Another way to split the total cost of a fully featured camping kit is to buy it module by module. This is possible especially for people who travel mostly by themselves. If a two module kit is desired, one camping module may be enough to even sleep on it. While a barebone module is by far the most cost effective option, even a fully featured module, from a kit of two, usually means half the price. So the cost is being split 50/50 while still being able to use the kit from day one.
The weight
The most obvious advantage of a modular system is the fact that modules are lightweight which makes it possible for one person alone to move them. A camping box can easily reach 80, even 100kg.
Some people have been there... lifting a big, bulky, heavy camping box into a vehicle. Probably not one of the nicest experiences. But many people simply must do this exercise every now and then. Some of us only need a camping box in our car whenever we do camping or when we travel. Other than that, the available space is needed for something else.
Now imagine that the big, bulky camping box weighing 90kg. is made up of 3 different modules, each having a weight of approximately 30kg. Isn't that a whole different story?
The fit
Another advantage is the possibility to fit the modules in spaces with a narrower opening than the actual available space. A good example for this is a vehicle that has a boot opening smaller than the actual interior available space. While fitting a full, one piece camping box in such vehicle would be very difficult if not impossible, the modules turns this into an easy task. Here is a real life example.
Let's say a vehicle has an interior width of 120cm between the wheel arches and 150cm above the wheel arches. Those wheel arches are 33cm high. And the opening of the boot lid is 120cm wide. In such vehicle a camping box having a 120cm wide storage box and a sleeping surface that is 150cm wide would fit just well as long as the hight of the box would be at least 35cm.
Question is how do you fit the camping kit that has a width of 150cm trough the opening lid that is only 120cm wide?
And that's one problem the modular system can solve easily.
For such vehicle, a 3 module camping kit would be the most suitable solution. Two lateral modules + one middle module as follows:
The left module would have a 40cm wide base with a 55cm wide top piece/plate (part of the sleeping surface) which would stick out 15cm towards the left. In other words, the sleeping surface would extend 15cm over the left wheel arch.
The right module would also have a 40cm wide base and a 55cm wide top piece which would stick out 15cm towards the right. In other words, a mirror version of the left module.
And the middle module would be 40cm wide at the base with a top piece of the same width, 40cm.
All 3 modules would be 35cm high.
And voila! Problem solved. Place the left module in the vehicle and slide it all the way towards the left, place the right module in the vehicle and slide it all the way towards the right. At this point a 40cm wide space would be available between the two lateral modules which allows the placement of the third module in between the two lateral modules already in the vehicle. See? Very much like tetris :-)
And since the modules we build are CNC pre-drilled and have pressed in t-nuts for screwing the modules together, just screw in those screws and the 3 modules become one whole strong camping box in that vehicle.
The pics below show a real life example. This is a 2020 VW Transporter for which we made a camping box made of 3 different modules as described above.
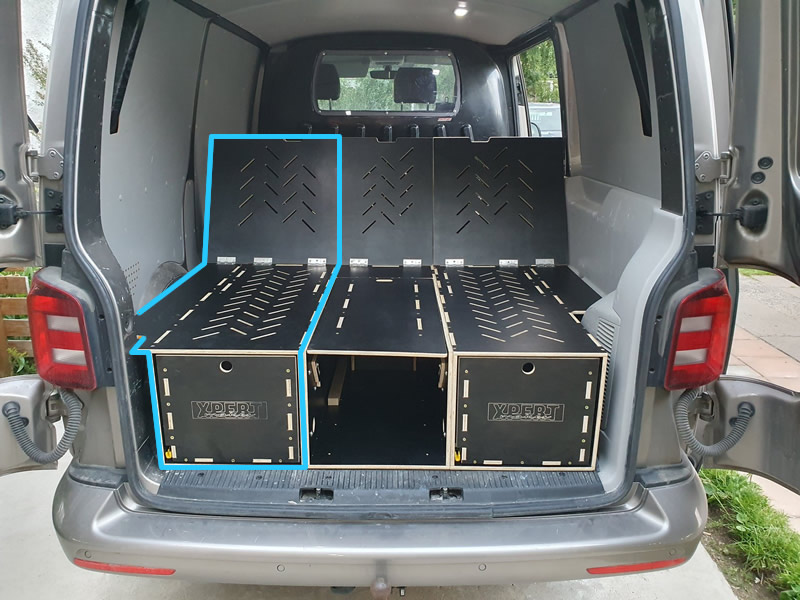
Left module
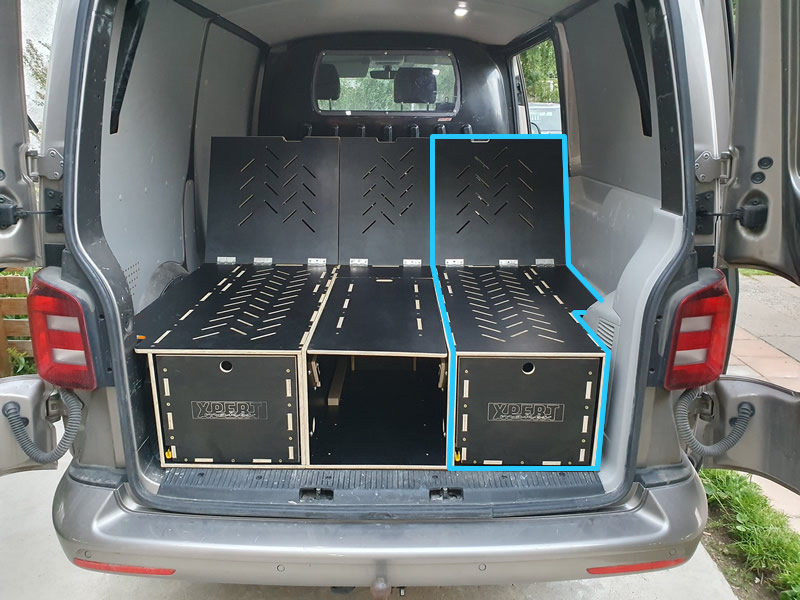
Right module
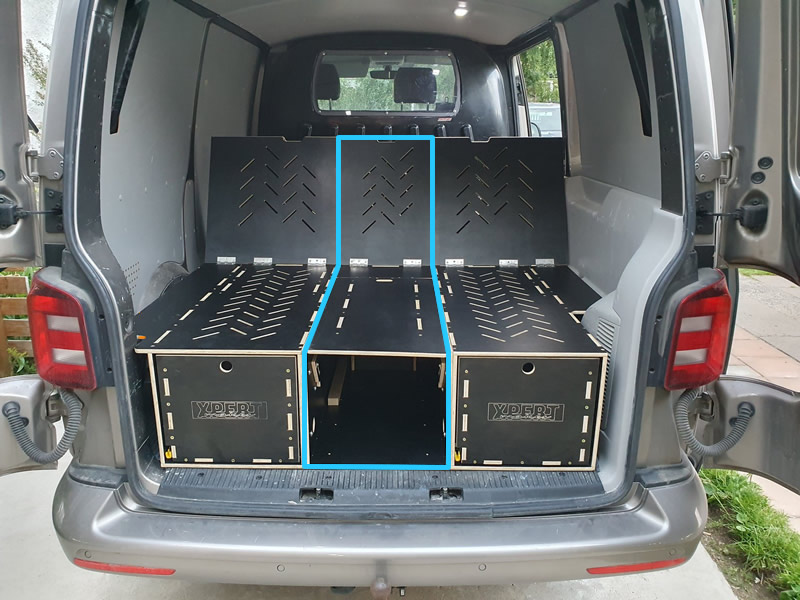
Middle module
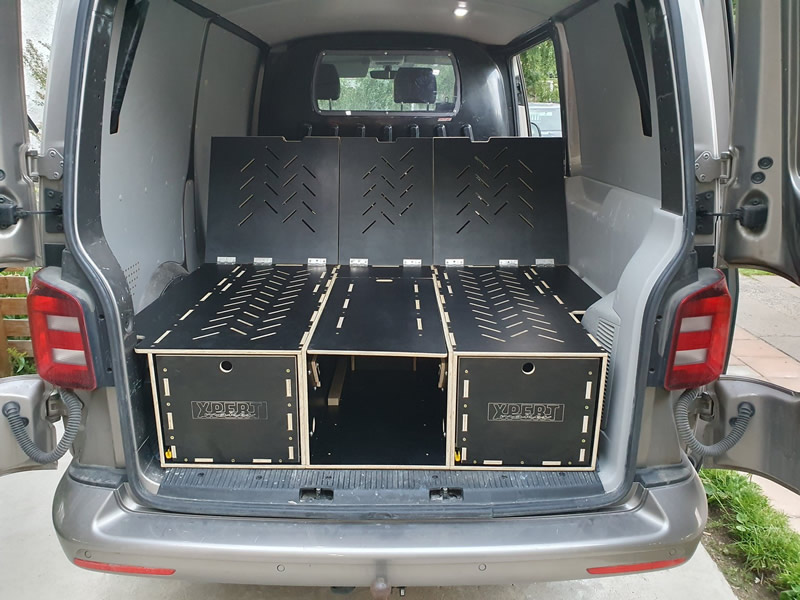
The complete camping kit
Same problem solved with two camping box modules. In this case the left module has a kitchen drawer and an open storage space while the right module is open space storage with movable vertical dividers which allows various storage space widths.
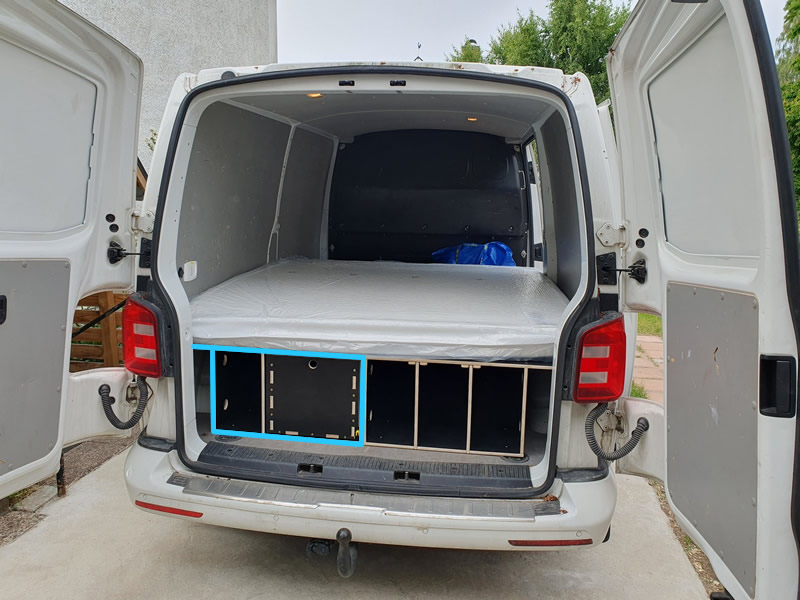
Left module
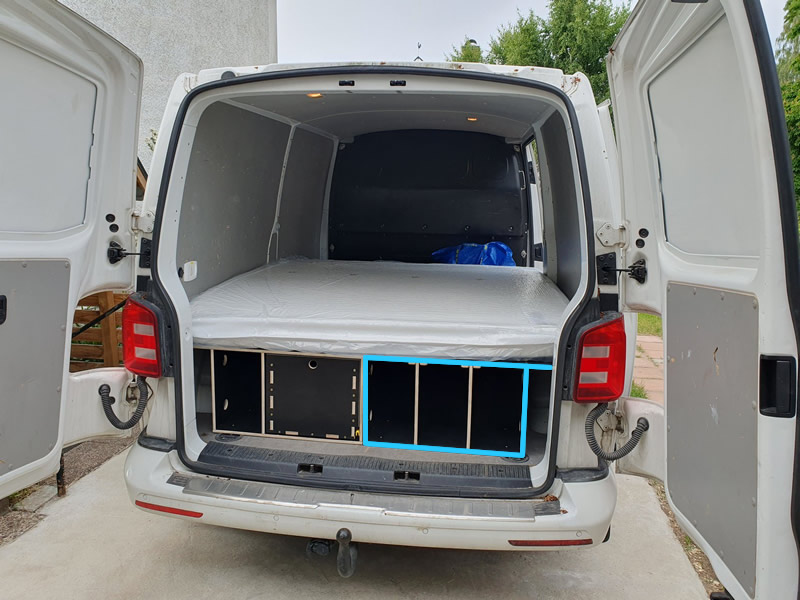
Right module
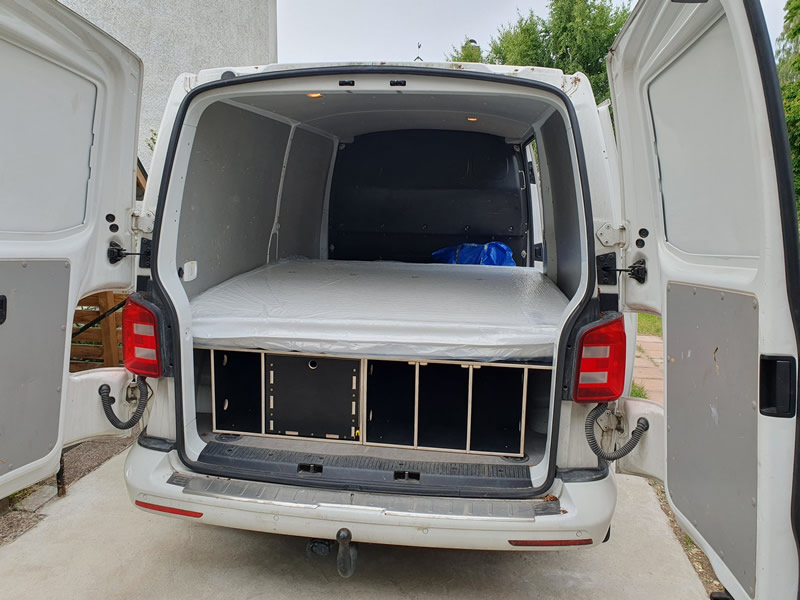
The complete camping kit
The storage
A kit made of modules is much more easier to store. The modules can be stacked one on top of another, they can be stored in different smaller spaces and, since our modules are fully dismantlable (capable of being taken apart, disassembled, or separated into smaller pieces) the range of possibilities is really wide.
The joints
That's right! Easier said than done.
As already mentioned, plywood is a great material for building camping kits and storage systems. Finding a ballance between weight, stiffness and overall rigidity for our boxes and drawers was quite a task.
In order to keep the weight of our products as low as possible, while not compromising stiffness and rigidity, we are mostly using 12mm thick plywood. The 12mm plywood tensile strength as well as its yield strength are way more than enough for the kind of products we build. But when pieces need to be joined, a rather difficult situation occurs.
The first thing we had to figure out is what type of joint works best. And it was the box joint, also known as finger joint. Basically a number of equidistant notches along the edges.
For a while, we screwed the pieces together using wood screws with pre-drilled holes trough those notches and into the side of the plywood. While putting the parts together this way gave decent results, there were two disadvantages:
1. It was a very time consuming task due to the number of holes that needed to be drilled and chamfered plus the number of screws that needed to be screwed in. All this was being done manually so the process also required a certain skill level. And all this raised the cost.
2. The finished product wasn't really dismantlable. Well, it was for someone skilled who could remove and put a wood screw back exactly in its initial thread but how many times can that be done without cracking the 12mm plywood?
So, we had to find a way to get rid of the side drilling/screwing in order to reduce production cost and make our products fully dismantlable, as many times as needed.
And the solution was to use metal screws. But metal screws need to be screwed into metal threads, right? So we went for the T-nuts which we press into the side of the plywood.
Alright, CNC cut holes at a certain distance from the edge, screws and T-nuts. But the plywood pieces are mostly installed at a 90 degree angle from each other... A screw doesn't go at a 45 degree angle from one plywood piece into the other one having the the pressed in T-nut...
And so the L-shaped bracket joined the game. We mostly use L-shaped brackets that are 35mm wide and each of the two sides are 50mm long. The thickness of the galvanized steel is 2.5mm. Pretty strong pieces of steel actually.
Since they (the brackets) are always inside the modules, they're not visible from the outside, especially when the module has a drawer.
The pics below should give you a more clear image about all this.
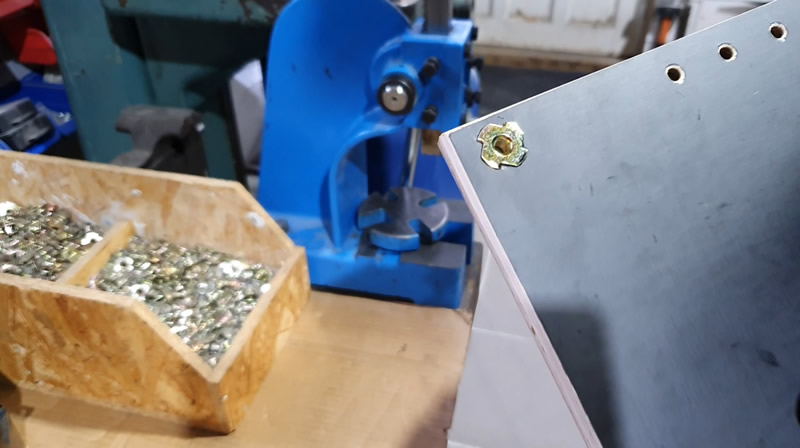
Pressed in t-nut
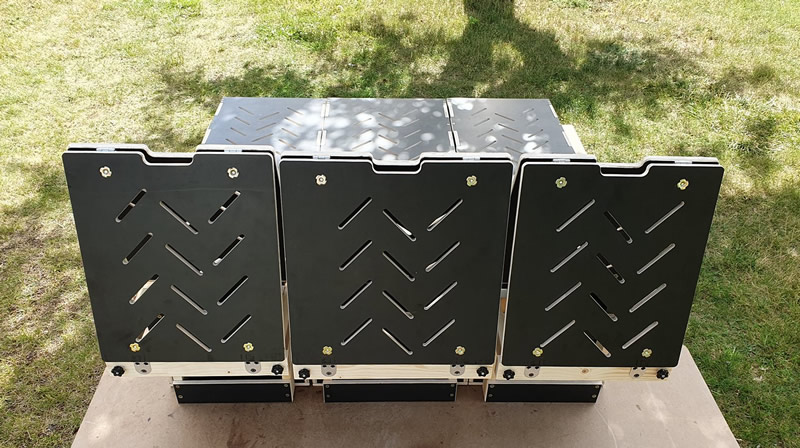
T-nut pressed in the sleeping surface pieces
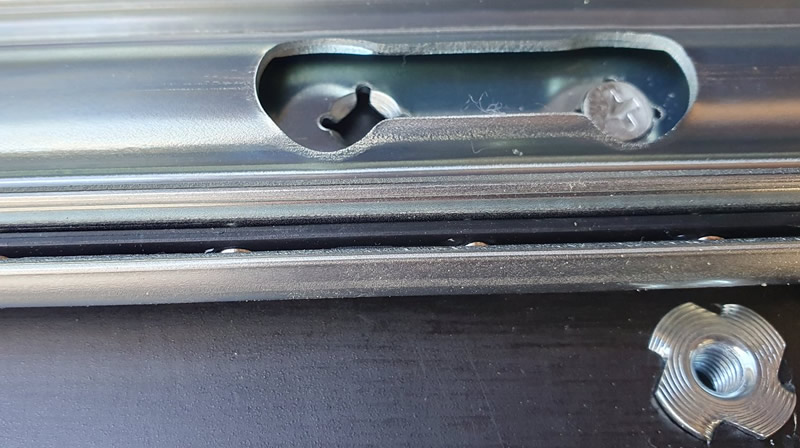
Drawer rail and t-nut - close view
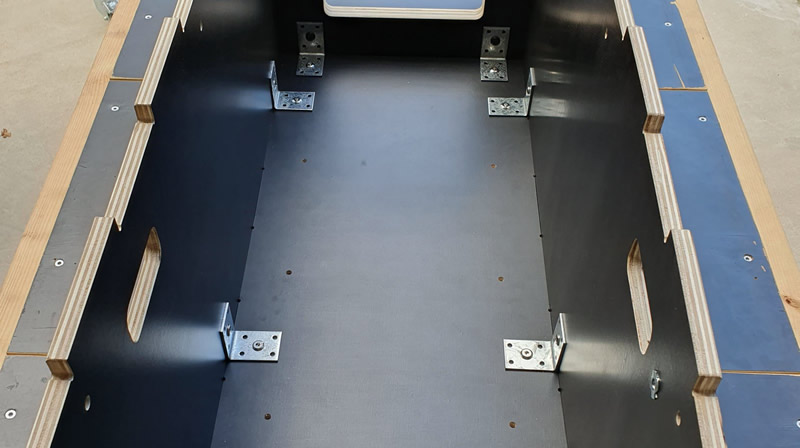
Camping box module - L-shaped brackets holding the plywood pieces together
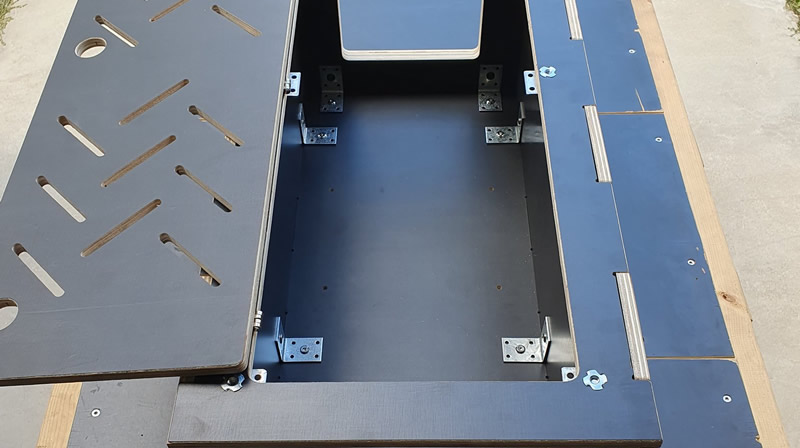
L-shaped brackets viewed trough the top lid of a camping module
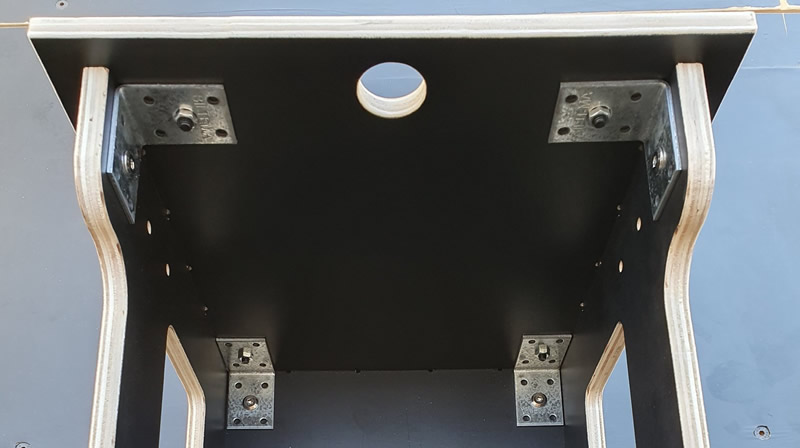
Front of a drawer, inside view
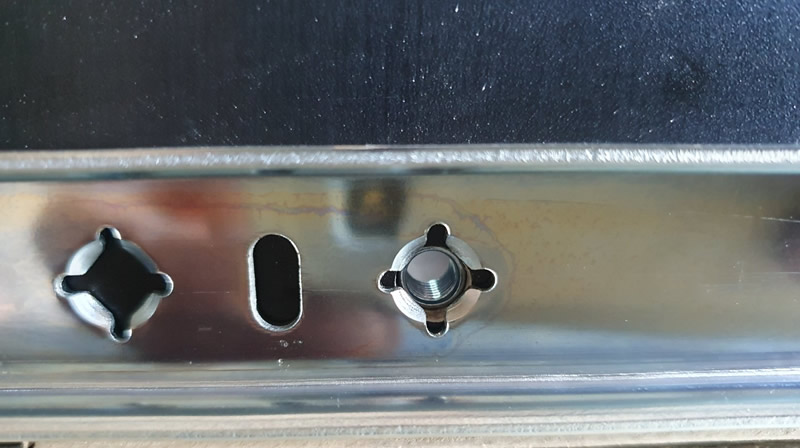
The pre-drilled hole with the t-nut (pressed in from the other side) for fastening the drawer to the rail
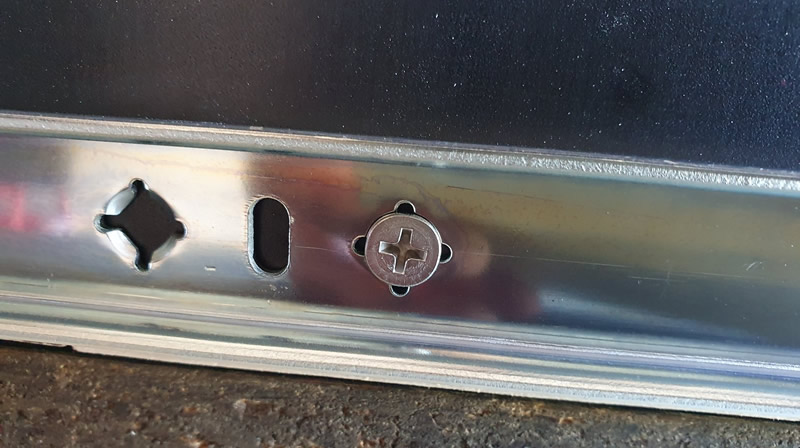
Dawer slide fastened to the drawer with M6 screw
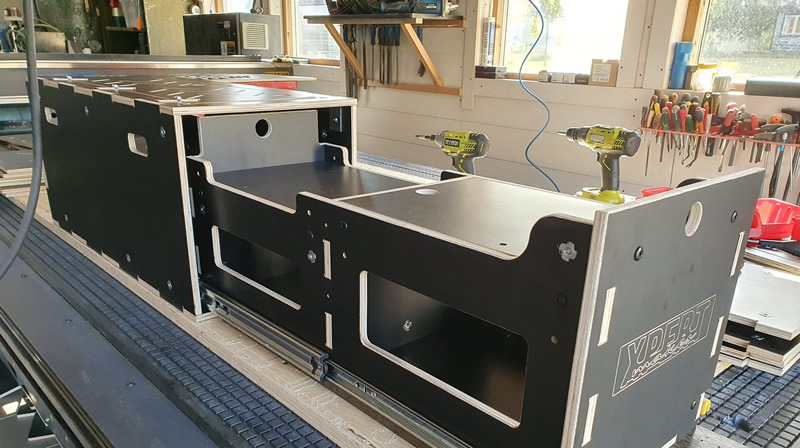
Kitchen drawer being installed
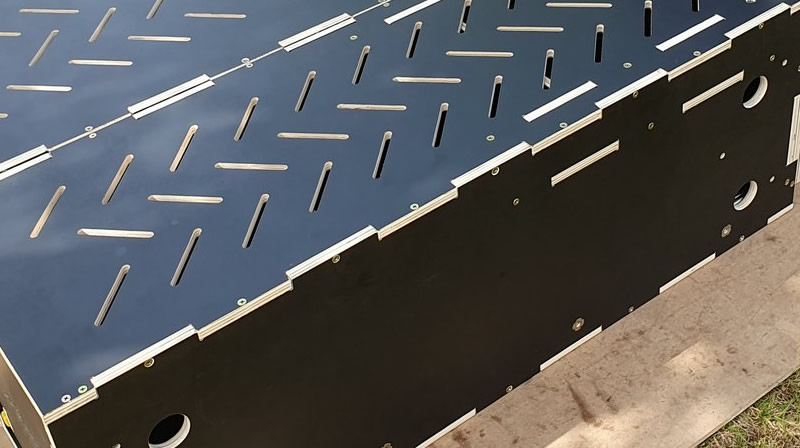
Finger joint - Pieces held together by wood screws
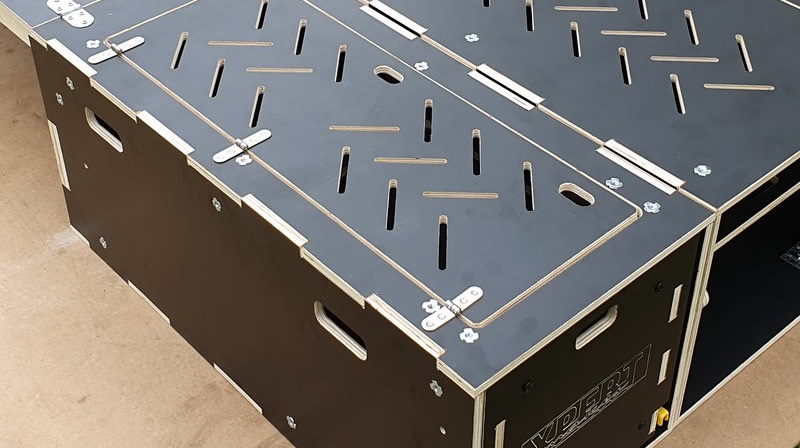
Finger joint - Pieces held together using M-6 screws and t-nuts
The stiffness
So, the sleeping sections of our camping modules are foldable. Some hinges easily provided the solution. But how about when they are unfolded? How will they be supported in the same plane as the top of the storage boxes so that they form a nice, flat sleeping surface?
The solution we came up with is the use of retractable beams. Two solid pieces of wood hold the foldable sleeping sections parallel and in the same plane with the top of the storage box to which they are attached with hinges.
The side advantage of this system is that our camping modules can be folded up to "sofa mode" providing a sitting surface with a backrest. And since this feature can be used for each module individually, a camping kit can be used at the same time by one person for sleeping (for example 2 modules folded out) while another person can sit on another module which is in "sofa mode" and work on the computer or just enjoy the view.
The beams that hold the sleeping sections retract inside the box (upper two corners of the module) when the sleeping sections are folded up (sofa mode)
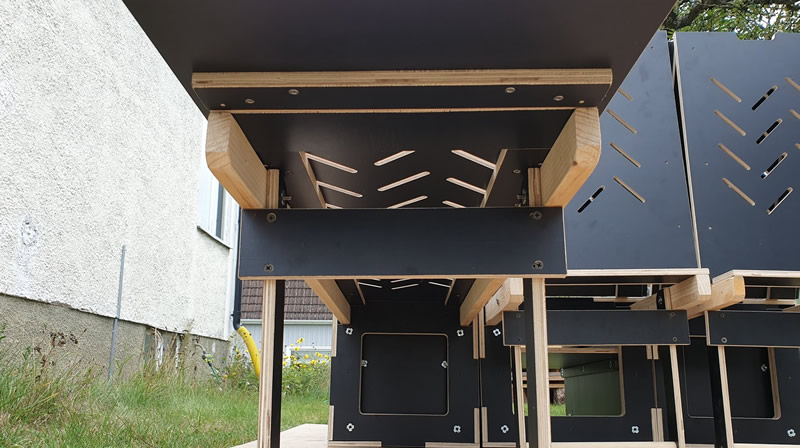
Retractable beams holding the sleeping sections straight
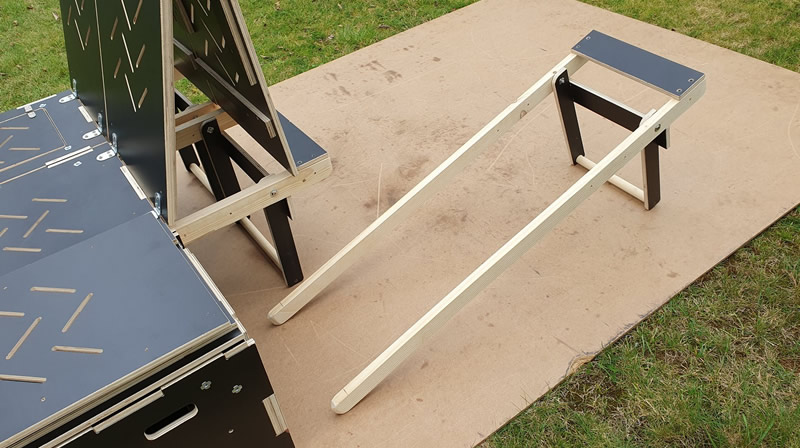
Retractable beams removed from the camping module
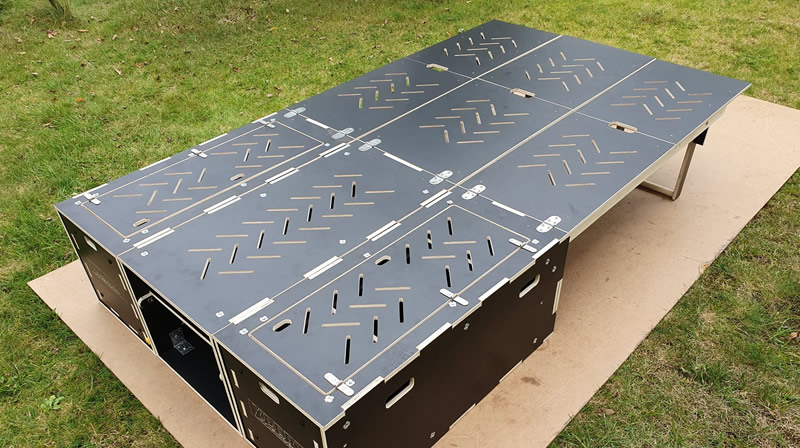
A nice and flat sleeping surface waiting for a mattress
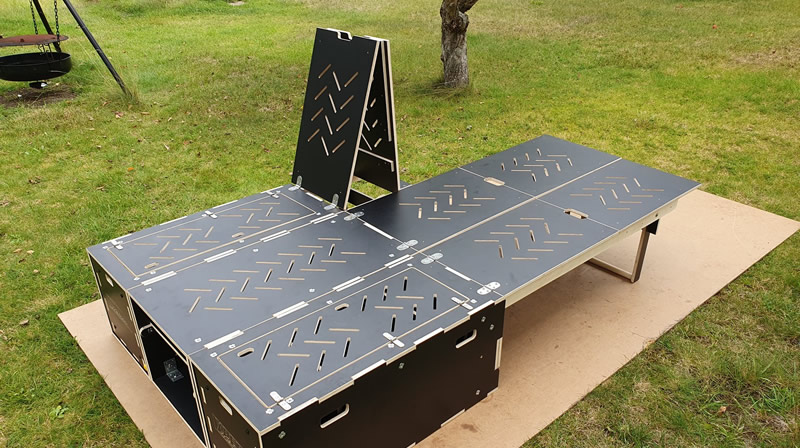
A 3 module camping box with one module in sofa mode and the other two in sleeping mode
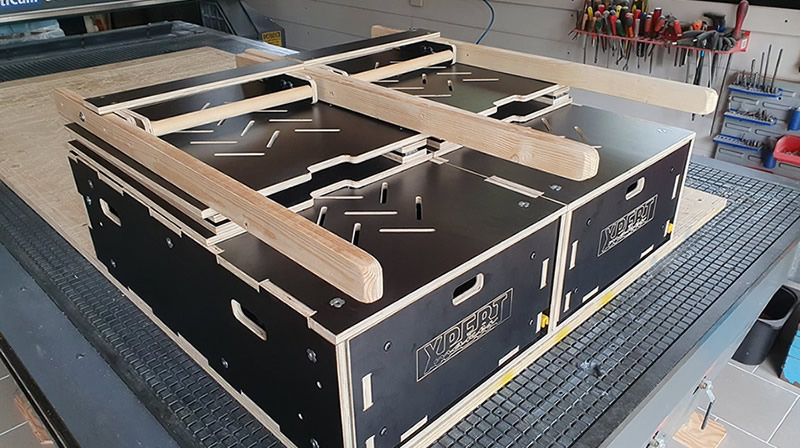
A two module camping kit folded up to use as little space as possible
The slope
While most cars and vans have a flat trunk floor, when folding down the last seat row the available surface may turn in two different surfaces situated at different heights. And if that's not enough, one of those surfaces may even be at an angle. In order to be able to have a flat sleeping surface when extending/unfolding the sleeping sections of the camping box, we decided to make available the hight adjustable legs for the retractable beams/sleeping sections.
This solves the problem of having to precisely measure the height at various distances from the trunk lid or door(s). Simply adjust the height of the legs so that the sleeping surface is flat and parallel to the horizontal part of the trunk floor.
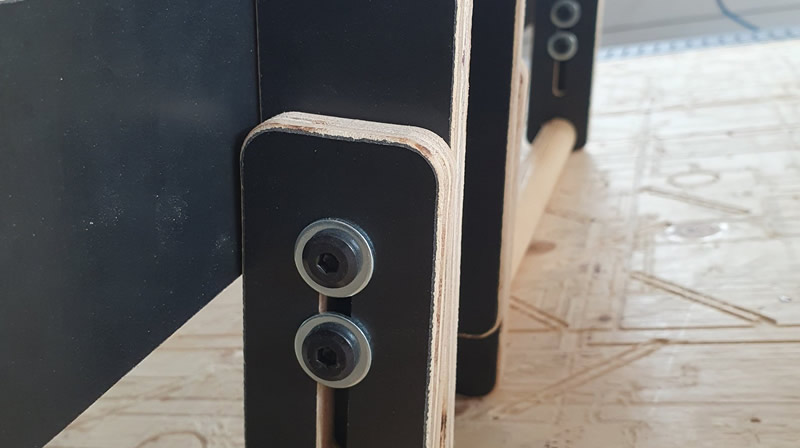
Height adjustable feet for the retractable beams
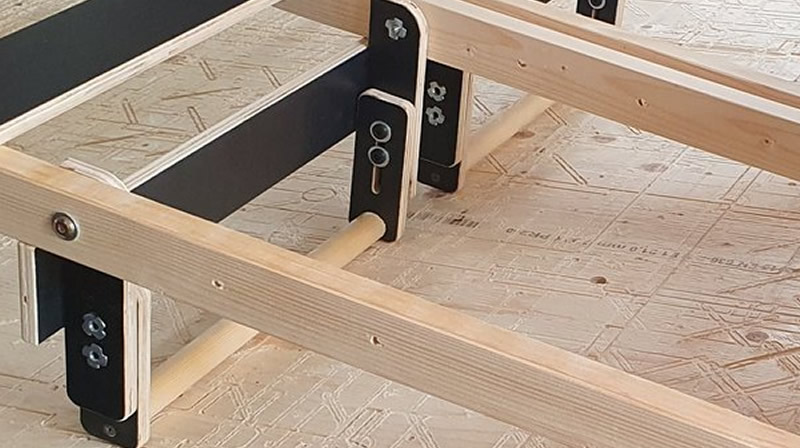
Foldable and height adjustable legs